Organize folders and lists
When your tasks outgrow a single list, build a tree for them: folders group your work by area, and lists hold the tasks. Folders nest inside folders as deep as you need, and a list can sit in a folder or at the top of the workspace. You do all of it in the sidebar, under Workspaces.
Before you start
You need a workspace. Every account gets one when it signs up, named after you.
Permission to create folders and lists
In someone else's workspace, your permission set must allow creating folders and lists. A workspace admin grants it, see Invite members and grant permissions.
Create a folder
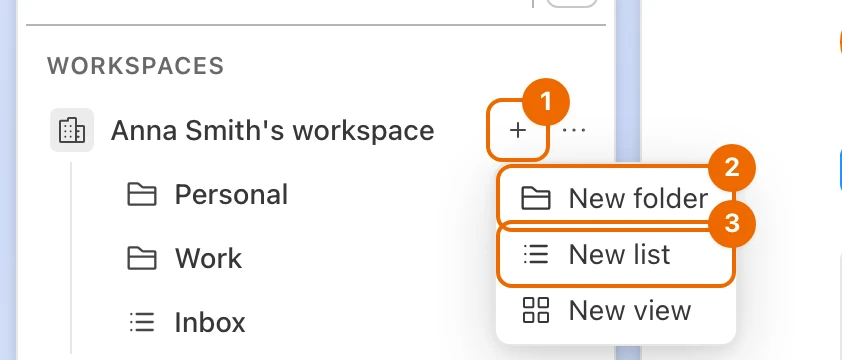
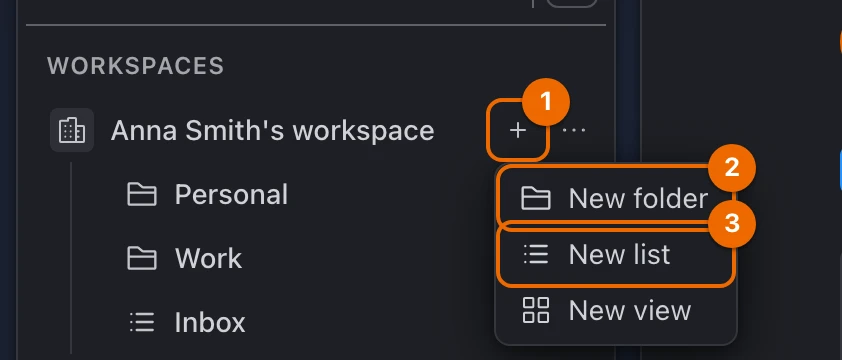
In the sidebar, point at the workspace row (or at a folder, to nest inside it). A + appears on the row.
No + on a touch screen
On a touch screen, open the row's … menu instead; it has the same items.
Click + and choose New folder. A Folder name field appears in the tree.
Type the name and press
Enter. The folder appears in the tree.
Create a list
In the sidebar, point at the workspace row or at a folder. A + appears on the row.
Lists live under Workspaces
Folders under User Views hold views and other folders, not lists. Create lists under Workspaces.
Click + and choose New list. The new list form opens on Details.
Fill in the details:
- Name: the list's name;
- Location: the workspace or folder it goes in. Opened from a folder, the form keeps that folder;
- Icon: optional;
- Inherit access: shown when the list goes into a folder. On, everyone with access to the folder sees the list; off, the list is private (Share a folder or a list).
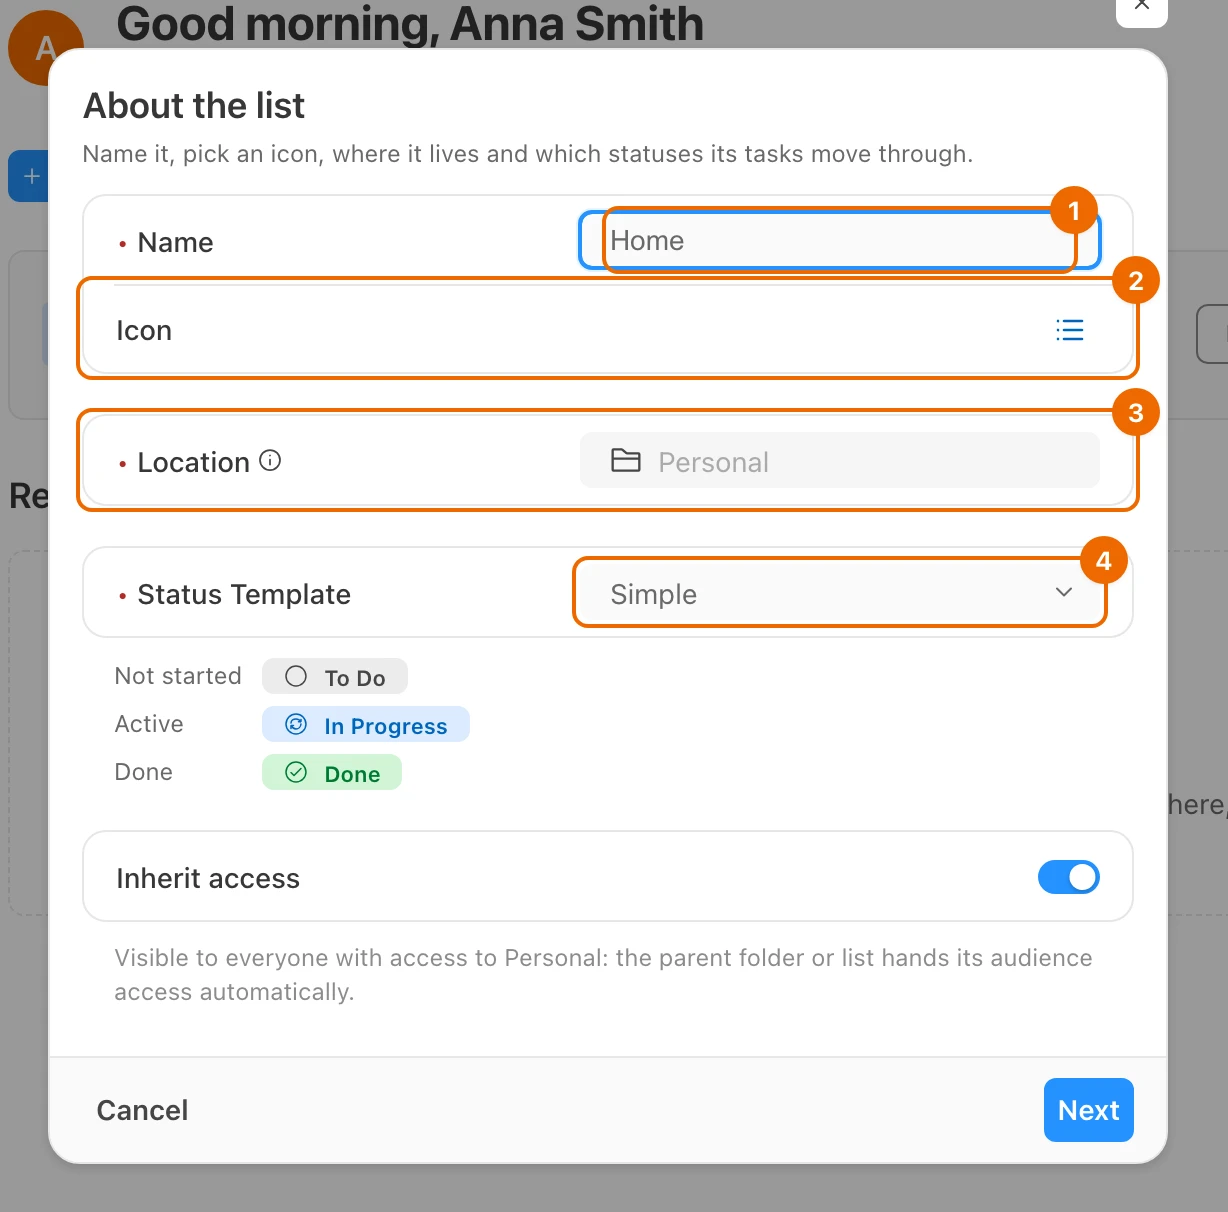
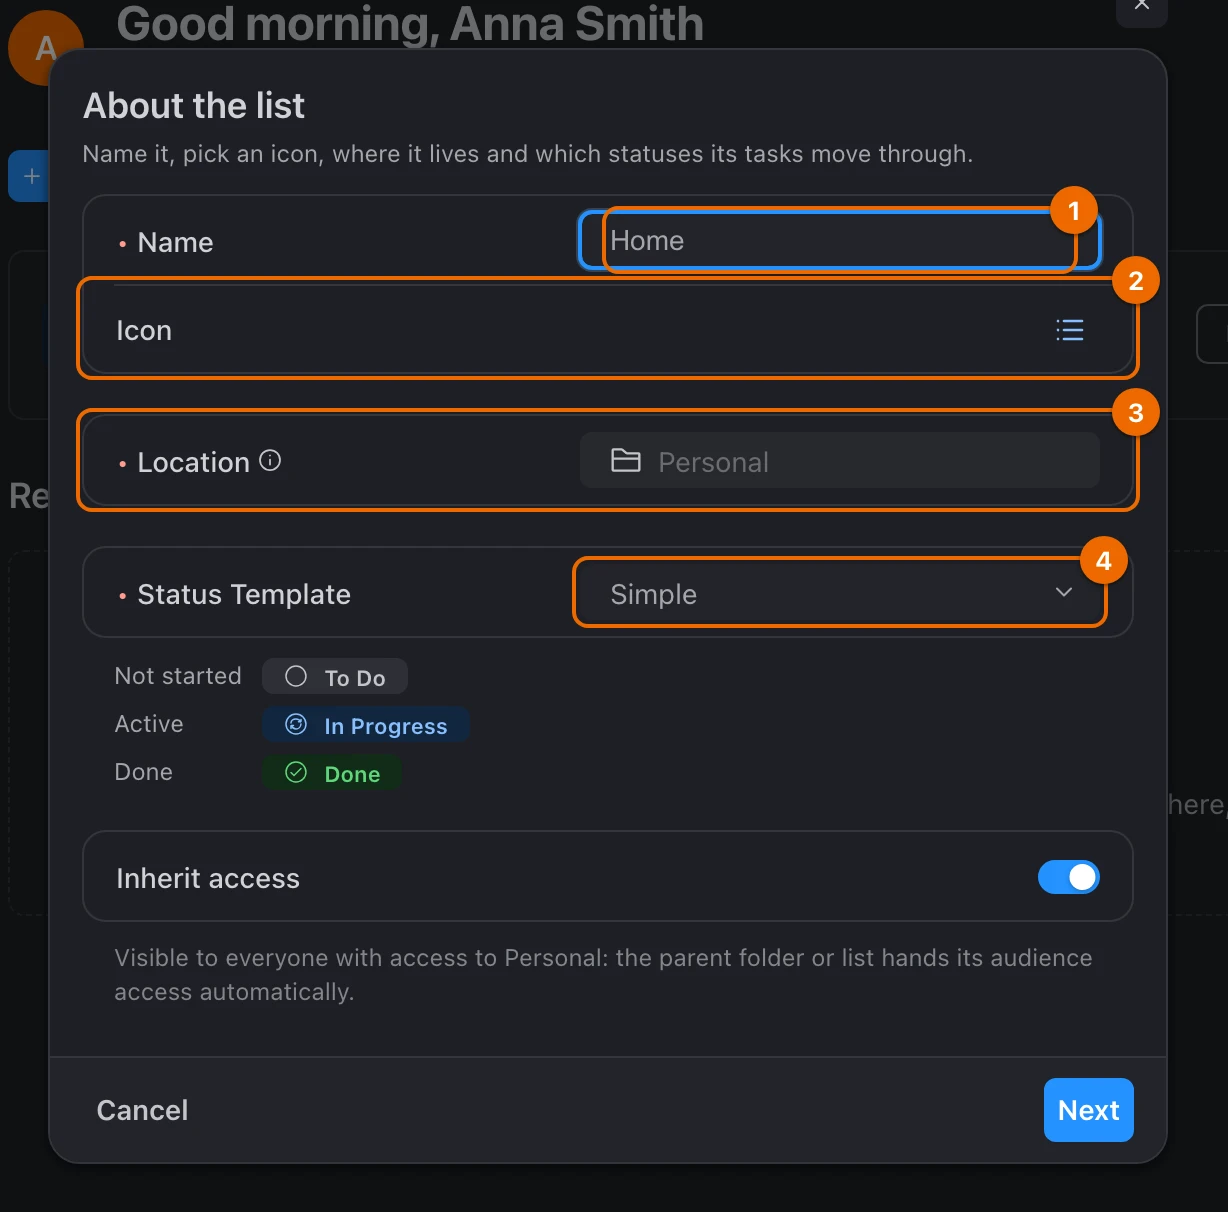
Leave Status Template on Simple (three statuses, from To Do to Done), or pick another status template.
Your own statuses
To name your own statuses, pick New template: an extra Statuses step appears, and the new template is shared with every list in the workspace. You see New template only if your permission set lets you create status templates.
Click Next. The Features step opens, with Simple list picked.
Keep the preset of list features, or pick another:
- Simple list: seven of the 14 features, enough for personal work. It has no assignee and no time tracking.
- Teamwork: every feature except Repeats and Story Points.
- Scrum: all 14 features.
You can change any of them later, see Set up a list.
Click Create. The list opens, empty, and appears in the tree. If its folder was folded, the folder unfolds to show it.
Rename and change icons
- Folder: open its … menu and choose Rename or Change icon.
- List: double-click its name in the sidebar to rename it. To change its icon, open its … menu, choose Configure, and pick the icon in General.
The icon picker offers icons or emoji; an icon also takes a color.
Reorder and move
Manual order only
Dragging and the move rows of the … menu work only in Manual order.
Click Sort sidebar at the top of the sidebar and choose Manual order. The tree switches to its saved order, and you can now drag rows.
New rows in manual order
A new folder or list is numbered after the others of its kind, so in Manual order it can land between rows. Drag it where you want it.
Drag a folder or list to a new place:
Drop Result between two rows the row lands there, at that level onto a folder the row moves inside it onto the workspace row the row moves to the top level of the workspace below a folder's last row, dragged to the left the row moves out of that folder Dropped onto a folder or the workspace row, it lands at the end. Each workspace has its own tree, so you can't drop a folder or list into another workspace.
These rows of a folder's or list's … menu appear only in Manual order:
| Menu item | What it does |
|---|---|
| Move up | moves the row one place up among its neighbours |
| Move down | moves the row one place down |
| Move to… | moves it into another folder or to the workspace root: pick the place in Destination and click Move. It lands at the end of that place |
Duplicate a folder
Duplicate a folder to reuse its structure, for example a client folder as the start for the next client.
Open the folder's … menu and choose Duplicate. A Duplicate "…" dialog opens, with Folder name filled in as the folder's name plus
(copy).Tasks are not copied
- Copied: the folder's sub-folders, lists and views, with their settings.
- Not copied: tasks, comments and activity.
No Duplicate in the menu
Duplicating needs a permission set that can create folders. Folders under User Views can't be duplicated.
Check the Folder name.
Pick the Destination: a folder, or Workspace root. It starts on the place where the original folder lives.
Optionally, select Copy sharing to give the same people access to the copy. Otherwise the copy takes its access from its new place, see Share a folder or a list.
Click Duplicate. A message confirms Folder duplicated, and the copy appears in the tree.
Delete a folder or list
Deleting can't be undone
Deleting a folder or list removes everything inside, tasks included. There is no trash to restore it from, so move the tasks you want to keep first.
Open the folder's or list's … menu and choose Delete. A dialog asks, for example, Delete folder "Work"? and warns that all lists and tasks inside will be permanently removed.
No Delete in the menu
Deleting needs Edit access to the folder or list and a permission set that can delete it.
Click Delete. The folder and everything in it are gone.
Sample personal tree
A solo setup that keeps life and work apart, with an Inbox list at the top (in Manual order):
Anna's workspace
├── Inbox            (list: chosen as your Inbox list in settings)
├── Personal         (folder)
│   ├── Home         (list)
│   └── Health       (list)
└── Work             (folder)
    ├── Clients      (folder)
    │   └── Acme     (list)
    └── Admin        (list)
To make Inbox your Inbox list, see Capture tasks to your Inbox.
If it doesn't work
- You can't drag a row, and the move rows are missing from the menu. The sidebar is sorted automatically. Open Sort sidebar and choose Manual order, see Reorder and move.
- You can't drop a folder or list into another workspace. Each workspace has its own tree. Create the list in the other workspace instead.
- There is no New list in a folder under User Views. Folders under User Views hold folders and views, not lists. Create lists under Workspaces.
- A folder's menu has no Duplicate. Folders under User Views can't be duplicated, and in a workspace folder you need a permission set that can create folders, see Permissions and access.
- A folder's or list's menu has no Delete. You need Edit access to it (Share a folder or a list) and a permission set that can delete it (Permissions and access).
- A folder has no + and its menu has no Rename. You can only read this folder. Ask for Edit access, see Share a folder or a list.
- The workspace row has no +, or its menu has no New folder or New list. Your permission set in this workspace doesn't allow creating them. Ask a workspace admin, see Invite members and grant permissions.
Related
- Folders inside folders: why the tree nests without limit, and what that gives you.
- Set up a list: statuses, fields and features of a list.
- Split a team's work into folders: a tree for a small team.